Rust Mesh Optimizer
When triangle meshes are rendered by a GPU, there are pipeline stages that need to load and process vertex and index data. The efficiency of this process will depend on the layout of the data, and how the GPU is designed. There is an excellent library from Arseny Kapoulkine called meshoptimizer, which provides a variety of algorithms for optimizing geometry for the GPU.
This particular library has started to gain quite a nice adoption, as previous algorithms were either standalone, rarely updated - if ever, or part of huge monstrosities like assimp. Even AMD Compressonator v3 includes support for meshoptimizer:  Source
As with other data processing operations, I have been pushing towards using rust as my defacto systems language whenever possible. Unfortunately, meshoptimizer is only available as a C/C++ library.
Rust Version?
I’m glad you asked!
Now available on crates.io. (Dual licensed for MIT / Apache 2.0). Documentation
Add this to your Cargo.toml:
[dependencies]
meshopt = "0.1.1"
and add this to your crate root:
extern crate meshopt;
There is a monolithic demo that covers the whole feature matrix, shown here:

The demo can also save out the optimized meshes: 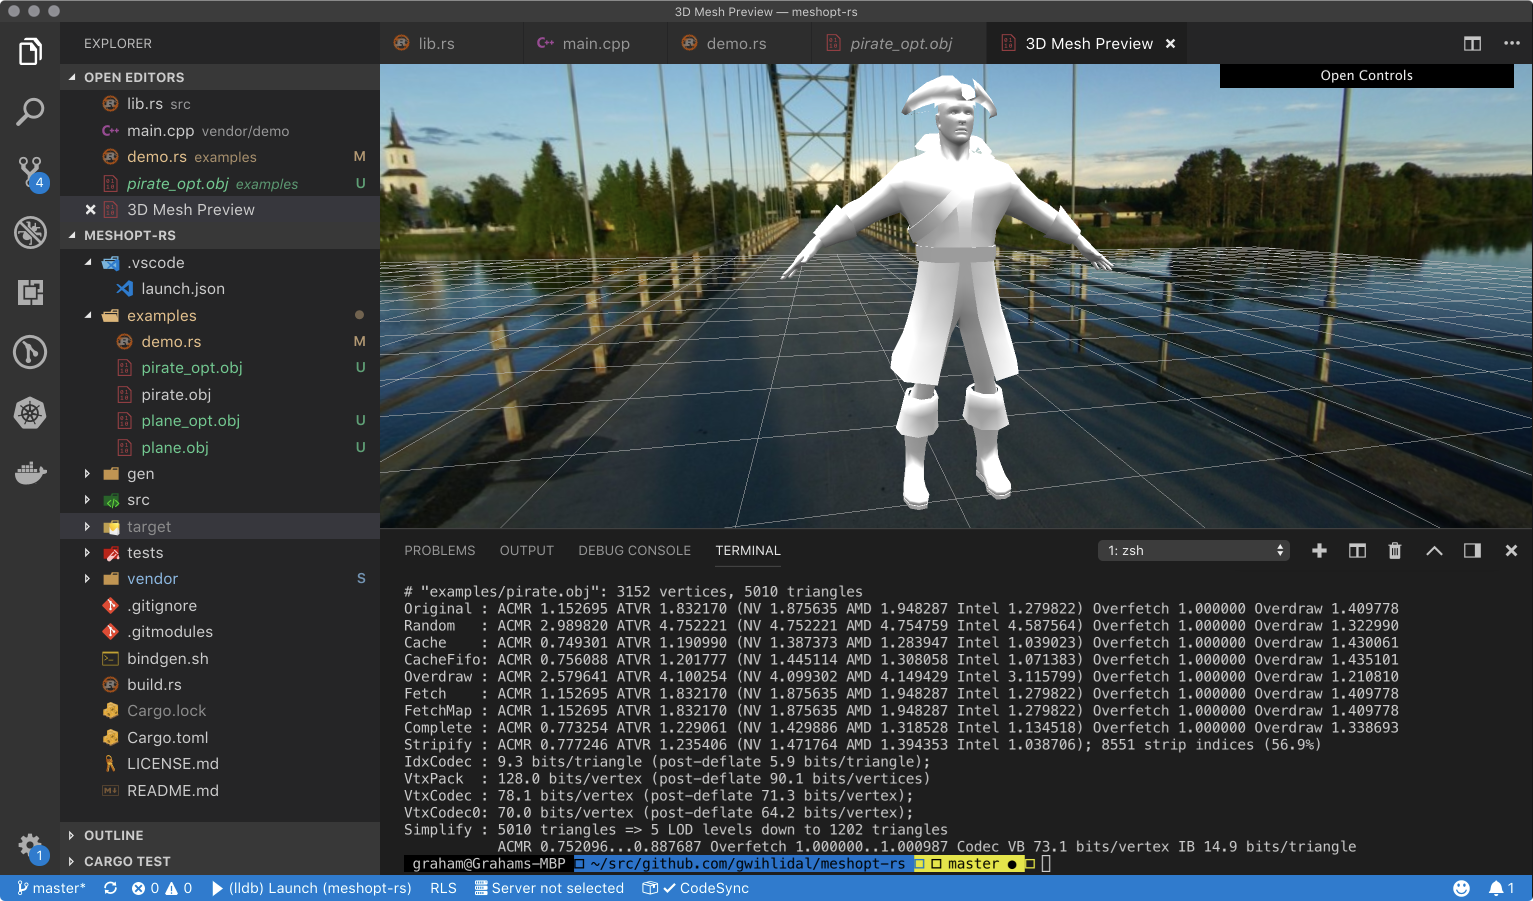
A future release will include an example tool that shows the minimum code needed to optimize for 100% GPU efficiency (relative to the available algorithms); tracked here.
There were two approaches to developing the rust version:
- Wrapping the existing library through FFI (Foreign Function Interface)
- Implementing a 100% rust version
From “The Rust Programming Language, Second Edition”:
Sometimes, your Rust code might need to interact with code written in another language. For this, Rust has a keyword, extern, that facilitates the creation and use of a Foreign Function Interface (FFI). An FFI is a way for a programming language to define functions and enable a different (foreign) programming language to call those functions.
After a bunch of planning, I decided to go with the FFI approach, for a number of reasons..
Why FFI instead of 100% Rust?
The C/C++ repository has active development, so making a 100% rust version would require ongoing porting effort to ensure the rust and C/C++ version code are in sync. Additionally, the C/C++ is already well optimized, so despite the typical performance improvements with rust code over typical C/C++, there are likely minimal gains from a full rust implementation at this time.
Lastly, wrapping an existing library with FFI takes much less development time than a full reimplementation, especially when a library (such as meshoptimizer) provides a C89 interface, eliminating any need to deal with symbol demangling, etc.
FFI bindings can be written explicitly, or they can be generated using the bindgen tool.
Install with:
cargo install bindgen
And process a header with:
bindgen --no-layout-tests ./vendor/src/meshoptimizer.h -o ./gen/bindings.rs
As an example, using the following C code:
typedef struct MyStruct {
    int x;
    int y;
} MyStruct;

void my_function(int i, char c, MyStruct* cs);
Running the above code through the bindgen tool produces the following rust code:
/* automatically generated by rust-bindgen */

#[repr(C)]
pub struct MyStruct {
    pub x: ::std::os::raw::c_int,
    pub y: ::std::os::raw::c_int,
}

extern "C" {
    pub fn my_function(i: ::std::os::raw::c_int,
                       c: ::std::os::raw::c_char,
                       cs: *mut MyStruct);
}
You can invoke bindgen in your build.rs source, but then all users all the library will need bindgen (and dependencies like libclang) available at build time. Instead, I explicitly generate the bindings and treat it like a regular source file in the repository (located at gen/bindings.rs).
In addition to generating a rust FFI binding to the native library, you must also link the library. There are three common approaches, depending on the build system or availability of the native library.
The first approach is to directly link a prebuilt binary into your executable, which is typically for system libraries or libraries built and deployed independent of your project. In your build.rs file, you can issue linker directives for rustc, allowing linking in libraries found in your path.
fn main() {
    // Tell cargo to tell rustc to link the system bzip2
    // shared library.
    println!("cargo:rustc-link-lib=bz2");
}
The second approach is to use the cc crate to compile the source code for a library:
extern crate cc;

fn main() {
    cc::Build::new()
        .file("foo.c")
        .file("bar.c")
        .compile("foo");
}
The third approach, where applicable, is to use the cmake compiler crate to invoke cmake for generating makefiles and building the native library. This of course requires the native library to use cmake as a method for building.
extern crate cmake;

fn main() {
    // Builds the project in the directory located in `libfoo`, installing it
    // into $OUT_DIR
    let dst = cmake::build("libfoo");

    println!("cargo:rustc-link-search=native={}", dst.display());
    println!("cargo:rustc-link-lib=static=foo");
}
or alternatively:
extern crate cmake;
use cmake::Config;

fn main() {
    let dst = Config::new("libfoo")
                    .define("FOO", "BAR")
                    .cflag("-foo")
                    .build();
    println!("cargo:rustc-link-search=native={}", dst.display());
    println!("cargo:rustc-link-lib=static=foo");
}
While meshoptimizer uses cmake for building, I did not want to require users of the rust version to have cmake installed, so I decided to go with the cc approach.
extern crate cc;

use std::env;

fn main() {
    let mut build = cc::Build::new();

    build.include("src");

    // Add the files we build
    let source_files = [
        "vendor/src/indexcodec.cpp",
        "vendor/src/indexgenerator.cpp",
        "vendor/src/overdrawanalyzer.cpp",
        "vendor/src/overdrawoptimizer.cpp",
        "vendor/src/simplifier.cpp",
        "vendor/src/stripifier.cpp",
        "vendor/src/vcacheanalyzer.cpp",
        "vendor/src/vcacheoptimizer.cpp",
        "vendor/src/vertexcodec.cpp",
        "vendor/src/vfetchanalyzer.cpp",
        "vendor/src/vfetchoptimizer.cpp",
    ];

    for source_file in &source_files {
        build.file(&source_file);
    }

    let target = env::var("TARGET").unwrap();
    if target.contains("darwin") {
        build
            .flag("-std=c++11")
            .cpp_link_stdlib("c++")
            .cpp_set_stdlib("c++")
            .cpp(true);
    } else if target.contains("linux") {
        build.flag("-std=c++11").cpp_link_stdlib("stdc++").cpp(true);
    }

    build.compile("meshopt_cpp");
}
Building and linking in meshoptimizer with the above code, and using the generated code from bindgen, now allows us to call any of the native API methods from rust.
Debugging with LLDB and VSCode
One of the downsides with rust compared to C/C++ is a lack of quality debugging tools. For all its faults as a text editor… Visual Studio has a really nice debugging environment. While not as good, there are extensions to Visual Studio Code (VSCode) that provide some level of debugging with a variety of backends (including LLDB, GDB, Windows).
The main debugger extension I have been using (Windows, macOS, Linux) for quite some time is CodeLLDB. Recently, Microsoft has released a new preview extension called cpptools, described here, which also supports those three platforms, and a variety of backends. Using an extension is fairly easy; start by installing the extension and relaunching VSCode.
Next, an extension specific config file (i.e. launch.json, tasks.json, etc..) needs to be created so the debugging engine knows how to launch and attach to your executable.
The easiest way to get this file is to select Start Debugging from the Debug menu:
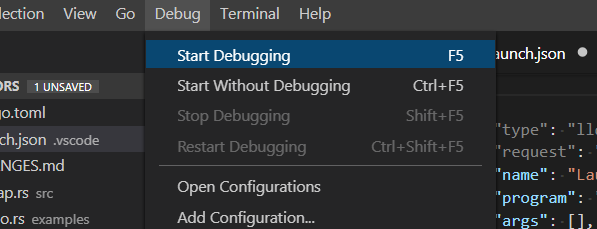
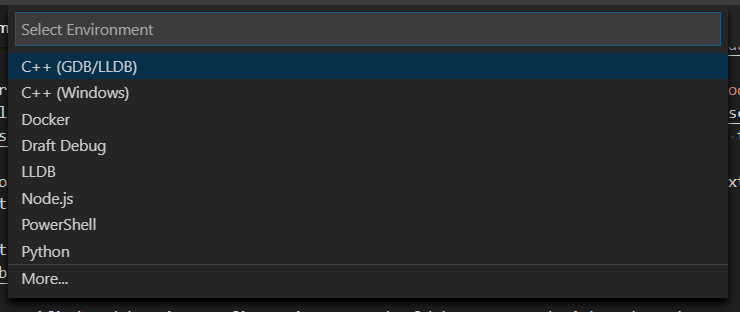
If you have not specified a debugging configuration, you should be presented with a drop-down to choose an appropriate debugging extension, and a file should be automagically created for you that configures this extension for your workspace.
As an example, here is a .vscode/launch.json file in the workspace root that I use on macOS:
{
    "version": "0.2.0",
    "configurations": [
        {
            "name": "(lldb) Launch",
            "type": "cppdbg",
            "request": "launch",
            "program": "${workspaceFolder}/target/debug/examples/demo",
            "args": [],
            "stopAtEntry": false,
            "cwd": "${workspaceFolder}",
            "environment": [],
            "externalConsole": true,
            "MIMode": "lldb"
        }
    ]
}
If everything works as expected, you should be able to Start Debugging again and have the debugging engine successfully launch your executable, allowing you to set breakpoints, inspect locals and callstack, and use the watch window.
Coming from Visual Studio’s debugging experience will leave you disappointed that a lot of functionality is missing from what you get in VSCode, but the majority of trivial debugging can be done with this approach. Never fear though, non-trivial debugging can still be done by configuring Xcode or Visual Studio to launch your binary and attach, or by using WinDbg. Another option is to use the new rust support in CLion, which includes a fairly rich UI on top of LLDB.
When developing 100% rust projects, very rarely should you need the debugger, at least the same frequency you would with C/C++. Generally with rust, if your code compiles there is a very high probability it will just work, or you will be given plenty of information to intuitively solve a given problem.
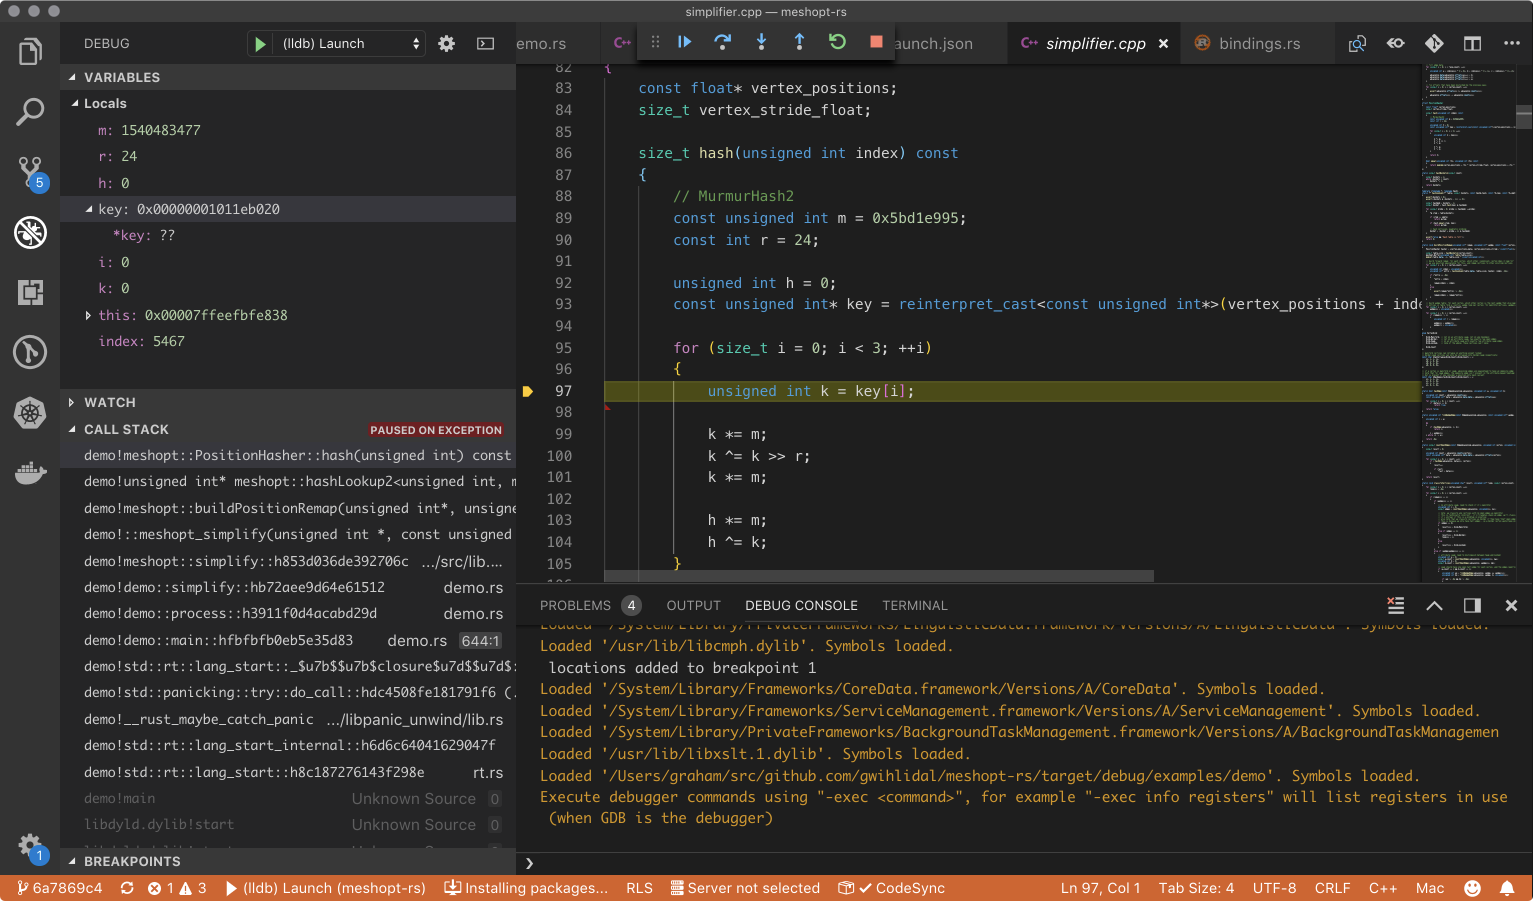
The fun begins when you start to call from rust through FFI into C/C++ libraries; then you’re in the wild west. If you set up your debugger properly, you can get nice stepping and debugging all the way from your rust code down into the C/C++ code, like the issue I had to debug in the following screenshot: